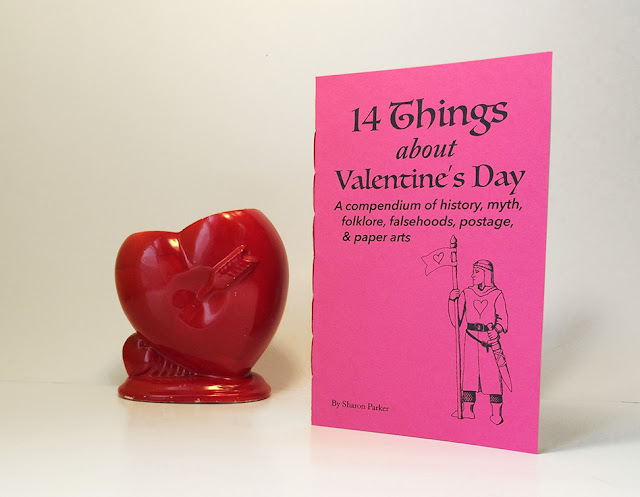
This is an excerpt from my chapbook 14 Things About Valentine's Day, pictured above.
How to Make a Puzzle Purse
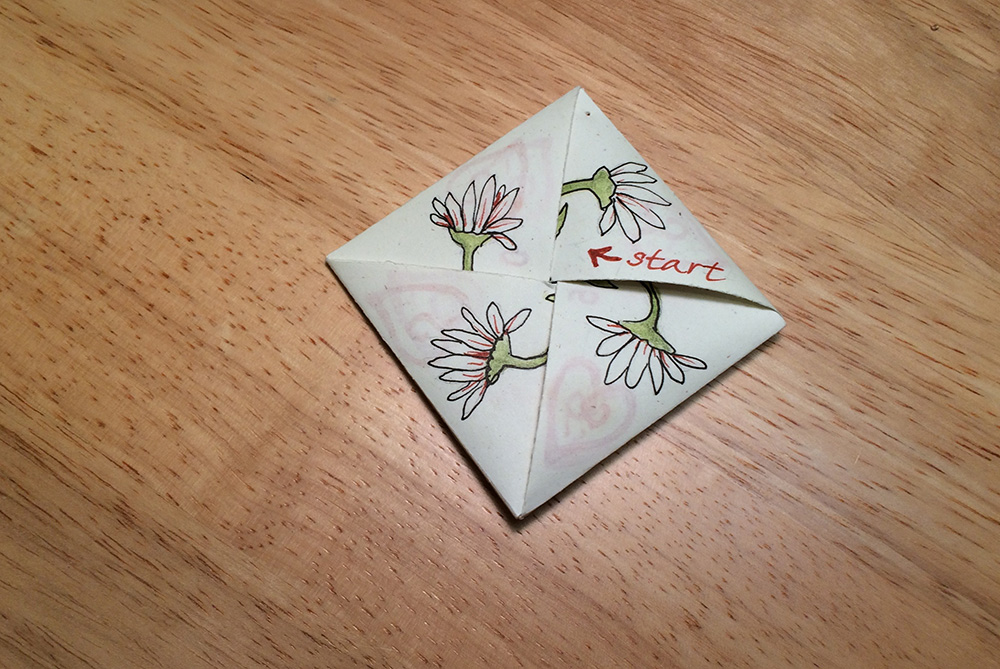
This is a folded paper package, sometimes called an origami puzzle purse, that predates the Victorian era, but was popular enough at that time to be commonly called a Victorian puzzle purse nowadays. Here's an example of one I made last year. (More views appear at the end.)
Start with a square piece of paper. It will be easiest if its dimensions are divisible by three. I cut my paper to 8.25 inches (2.75 x 3), which I chose because it is equal to 21 cm, so it divides by three no matter which measuring system you use.
(1) Fold and crease diagonally, open, rotate, then repeat across the opposite way to form an X.
(2) Keeping the same side up, fold in thirds like a letter, crease; then rotate the paper 90 degrees and fold in thirds again, making 9 squares. Here’s where it’s helpful if the dimensions are a multiple of three—if you are not expertly precise with your letter folding, you can measure, mark, and score the fold lines first.
That little square in the middle is going to be the focal point, and it will remain flat, despite the diagonal folds that pass through it. For now, put an X there with a pencil to help you keep track of what will be the inside of the finished packet.

(3) Turn the paper over (the penciled X face down) and make a diagonal crease in each of the squares that doesn’t have one yet (the center one along each side), starting with the one on the right side, by bringing the top horizontal crease of that square to meet its left vertical crease, and then creasing the diagonal within that square only, then opening it up again. Rotate the paper and fold and crease each of those center side squares in the same manner. The new creases are shown as dashed lines.

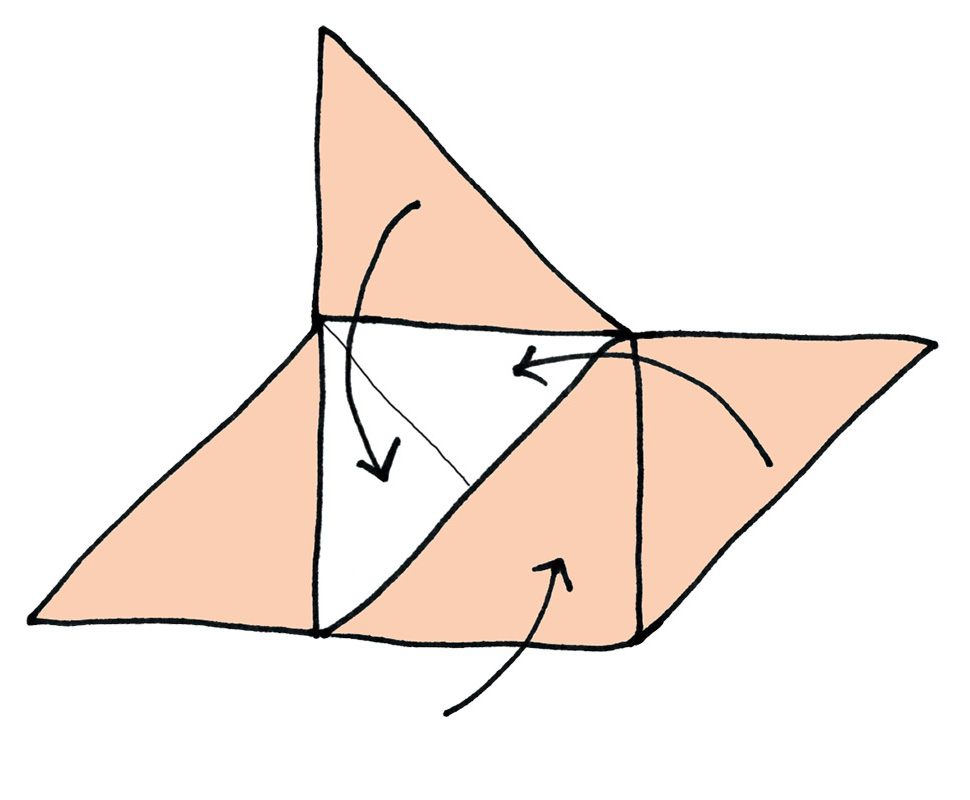
(4) Now turn over again (X side up), and here’s the part I find a little bit tricky: You’re going to pinch the corner diagonals as valley folds and twist the whole contraption counterclockwise to fold it into a pinwheel. At this point you may find that it doesn’t quite lie flat like it’s supposed to, so adjust your creases a little as needed to make it nice and flat.


(5) Now take one point of the pinwheel and fold it in over the center, and then do the same with each point, working counterclockwise again, creasing as you go, and smooth it to make a nice flat square.
(6) Tuck the last point into the first one.


And there you have it. You can draw pictures or rubber stamp images on it, and write messages (or a riddle) on the flaps to be read as it is opened. Most people number the triangles (in a decorative way, of course) so that the recipient knows which one to pull open and read first.

You might also add a little note on the last flap to be opened: “pull gently on opposite points to open fully.” Or something like that.

On the center square (where you penciled the X) you can write a message, or the end of your riddle (or a pictorial clue?), or create a mini collage, or place a square card or a smaller puzzle purse—just make sure that anything that you place or glue in the center is slightly smaller than the center square so that it will all fold flat.

A basic search for "victorian puzzle purse" via Google or on Pinterest will reveal lots of clever and beautiful ways people have embellished these over the years (as well as different instructions and tutorials, in case mine aren't working for you), from easy and simple to quite intricate, which are sure to give you some ideas for what to do with yours.
Oh, this is totally sweet :)
ReplyDeleteI know this is a post from five million years ago, but this is the first tutorial for this that was actually clear to me so thank you!
ReplyDeleteI saw one of these puzzles on Instagram earlier today, then headed over to YouTube to see how to make one. Couldn't get the pinwheel shape, so googled and that search led me to your blog. You cleared up the puzzling bit for me, and I can now make these lovely little creations. Thanks for posting this, and I'll certainly take a browse through your other posts. Best wishes, Valerie
ReplyDeleteJe cherchais ce genre de "sac à main Puzzle" que je n'aurais eu l'idée d'appeler comme ça, pour faire en tissu. Votre explication est superbe
ReplyDeleteJe vais regarder sur Youtube mais il semblerait que on ne puisse trouver
En attendant bravo et merci pour votre tutoriel
Bonne année 2024
Dane
J'ai cherché votre livre sur internet, pas trouvé
ReplyDelete2015 Thanks for doing this as a blog instead of YouTube. Easier to follow. Thanks. I thought your directions were stellar. Figured it out and made one. Thanks again.
ReplyDeleteSo good to know. Thanks for commenting.
DeleteThank you very much! I finally got it! That pinwheel twist was eluding me, but with your help I got it!!
ReplyDeleteI'm so glad it worked out for you. Thanks for commenting.
Deletepoint 4 was so good! ive watched so many videos already and this is the only thing that made me understand! haha thanks 💗
ReplyDeleteSo good to know. Thanks for commenting.
ReplyDelete