
When I am making tiny chapbooks,

... or handbound journals or notebooks,

... or the mini notebooks that I like to give away with orders from my Etsy shop (in an attempt to remind people to come back and buy again), I always have little snippets from the ends of threads and other small bits of trash.
And so for convenience, I started placing a yogurt container on my table as a mini wastebasket so I could keep my workspace free of debris. I empty it into my main wastebasket, so I only have one to empty on trash day. (As you can see, there's also a small bag with R for recycling for paper scraps.)

Well, one thing about photographing your workspace to share with the public because you read somewhere that that's a good thing to do to promote yourself, is that when you look at it through a camera lens you notice things like a yogurt container sitting on the table, and you think, well, that's not very attractive.
And if you already have spray paint leftover from a previous project, it's a pretty simple matter to bring it all out to the garage and have a little fun with it.
 |
| Above-mentioned previous project—repurposed mint tins |
I figured why not paint three of them while I'm at it, especially since I have more than one "work station" in my office-studio. The other work station is for preparing orders for mailing, which, wastebasketwise, mostly involves the little strip that I peel off the adhesive part of the flap on my mailing packets. The third container is just because why not? I'll find another use for it.
 |
First I placed them upside down on a box so the color would cleanly cover across the bottom. I sprayed a few coats of the green, which has built-in primer, until all was covered, then sprayed a little of the red-orange and blue to get a splotchy look. I didn't bother to use bubble wrap and other materials, such as I used on the mint tins above to create interesting textures, because I wanted to keep this project quick and simple.

After the paint was dry, I turned the containers over and lightly sprayed around the top to paint the rim, without concerning myself about the insides because they were plain white to begin with, so no need to coat them with paint, but nothing wrong with a smattering of color, right?
I kinda wish I had thought to lay down a nice piece of cardboard to take advantage of the colors and shapes that resulted on the surface around the containers. Maybe I'll think of that next time I have a spray-painting project. (I still have some of this paint left.)
So now I have a pretty mini wastebasket on my work table (and I fixed up a "new" bag for recycling, from an old gift bag).

(And I suppose I should get back to assembling the new notebooks I designed recently so I can add those to my shop.)
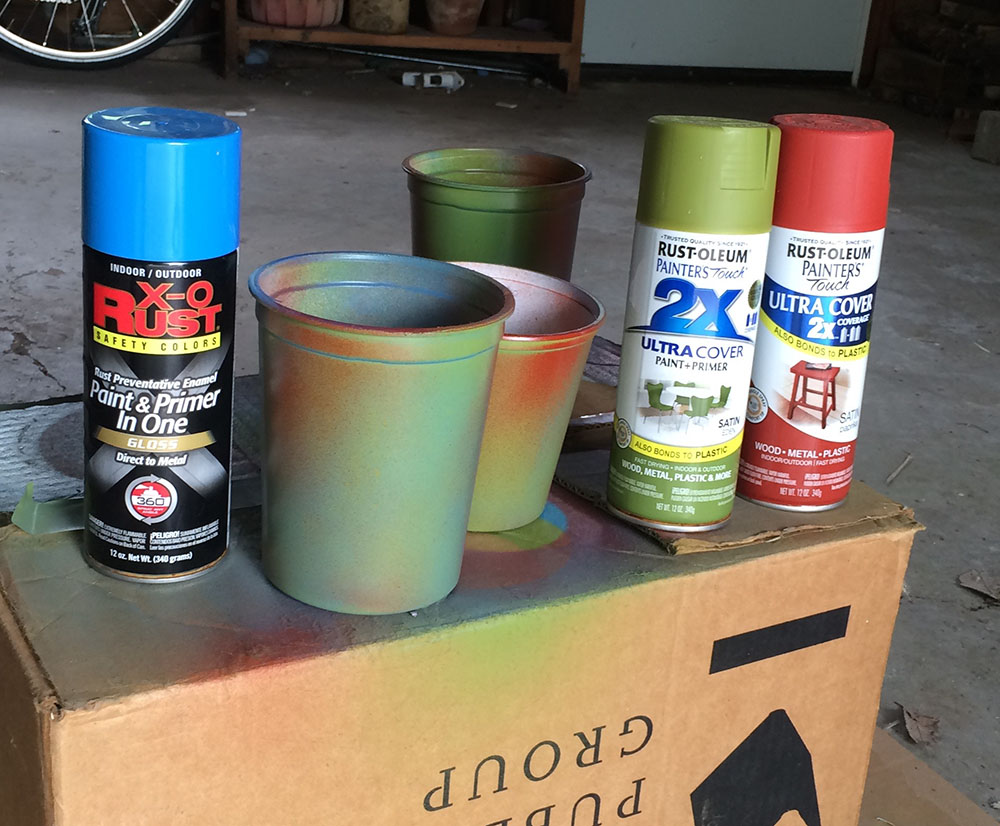
In case you really like those colors and are wondering what they are called, here's a pic of the paint cans. The blue is called "safety blue," the green is "Eden," and the red is "paprika."