Showing posts with label Sharon Parker. Show all posts

Sunday, September 12, 2021

Two Soft Cover Journals with a Cross-Stitch Binding

 In my last post, in which I wrote about the crisscross aka secret Belgian book binding, my first photo included two soft-cover journals with exposed stitches on the spine that cross over each other to form overlapping X's. It occurred to me that a person might think that would be called a crisscross binding, too, so I mentioned simply that those are different, but didn't want to say more about them in a post about the other journals. So now I am going to tell you a little about those.

It's called a cross-stitch binding, though I've also seen it called by other names, including a "corset" binding. In order to get the stitches to cross on the outside, you have to double back some on the inside of the signatures, so the fancier the X-pattern on the spine, the more stepping back and doubling up on the stitches you need to do on the inside, which can get a little tricky and may make the middles of those signatures a little bulky. Find a good demonstration and examples of this on Margarete Miller's website here. I agree with her conclusion that, while it's an attractive binding and kind of enjoyable to figure out, it's not something I want to do very often, because it's pretty fussy and the enjoyment diminishes after you've done a few of them.


These two small journals are made with a flexible cover-weight paper that has attractive striations on one side. I made them with a wrap-around cover and pockets in the back with the idea that they would make nice travel journals. They're about 4–5" high and wide, with moderately heavy paper that will take light use of wet media. The pockets are made from some large security envelopes I saved because I liked the pattern on the inside, and the paper was fairly heavy and durable.

The back cover wraps around and tucks into the front cover, where I put a circle of decorative paper and a white label so you can give your journal a title — or at least to make it clear which side is the front! But, seriously, I label my travel journals with the year and some reference to the contents, such as "2021 Road Trips," so I wanted to facilitate labeling them like that.


Come to think of it, I should do a post about my travel journals sometime. They're kind of a cross between a journal, a sketchbook, and a scrapbook. I guess that would make them visual journals. Anyway, I'll show you some examples of those next time.

Thanks for reading. These two journals will be available at my site during LoLa, which is coming up very soon! September 18–19 (2021), from 10 a.m. to 4 p.m. I'll be in my front yard with the journals and some other things on a table out there, and more items in the front porch for socially distanced browsing inside and out. My site is number 23, which you'll find on the LoLa website here. Or click on "Artists Directory" and enter my name (Sharon) into the search bar at the top (blue background). 

Stop by and say hello if you're in town (Minneapolis, Minn., that is).

Wednesday, August 18, 2021

Little Boxes

I've been making little boxes this summer and it occurred to me that there's no need to keep that as my little secret, so let me tell you — and show you — a little bit about them. The boxes shown here (and more boxes yet to be made) will all be available at my site during the LoLa art crawl in September. (My page on the LoLa website is here.)

A couple of years ago I had taken an in-person class (remember those?) at the Minnesota Center for Book Arts on how to make a specific type of box called a clamshell, which are mainly made to protect old books. That's a worthwhile thing and I do intend to make them for the old Bibles that my husband and I each inherited from our mothers. But the real reason I took the class on making clamshell boxes was because it was the only box-making class being offered at the time.

So when they offered an introduction to box making via Zoom this June, I was happy to jump in. What I really want to make are small lidded boxes and that's what this class was about. The boxes we made for the class were about 4" by 6". After finishing those, I started making smaller ones, both because I really like small things and also because I like using up scraps and bits that are too small to make much, but that I like too much to discard.  

For example, in the photo above, the small neutral-colored box in the back to the left has a decorative square on the lid covered with a piece cut from a metallic gold envelope somebody used to send us a greeting card. And I'm really tickled by the blue-and-white one at the front, which is covered entirely in security envelopes, then topped with a vintage shanked button. That box is about 2" by 3" and is constructed with scrap chipboard left over from other projects.

This green box is a good example of using up leftover supplies. I bought the green book cloth this summer, but the rest of the materials I found by rummaging in my scraps. I've had the green paisley paper for a very long time and I don't know when or where I first acquired it. The lining of both the lid and the box (the bottom part of the box is called the tray) is the last of some scrapbooking paper I bought when I used to use that type of paper to make sleeves for my calendar cards. I love the distressed look and the pastel colors, especially pale pink! With subtle green polka dots! So I made a box small enough to use the available scraps I had.


The handle at the top, as you have no doubt guessed, is a vintage wooden game piece, like from Sorry or something. It has a lovely aged patina and is the perfect shade of green to go with the other materials, don't you think?

I'm also making journals for LoLa, and some of those are also small, to use up leftover materials. But that's a topic for a different blog post.


Tuesday, August 19, 2014

I Am a LoLa Artist Too!

The LoLa art crawl is this weekend, August 23–34!! I will be participating this year at the Minnehaha Professional Building, 3960 Minnehaha Avenue (site No. 39 on the LoLa map), with artists Jymme Golden and Laura Burlis.

What's the secret of secret Belgian binding? I will show you at the art crawl.

Stop by between 10 a.m. and 5 p.m. Saturday and Sunday to enjoy shelter from both rain and heat in this comfortable air conditioned space on Longfellow's main drag, as well as refreshments, cool demos (Laura Burlis on making millefiore canes, me revealing the secret of secret Belgian book binding, and Jymme with her sketchbooks open to show her process), and a give-away drawing by Jymme, and maybe me, too.

I have been making a few new things for LoLa and I thought I would give you a little preview of some of them.


A fun series of projects I started this spring are little hand knit pocket doll critters to tell your troubles to or play with (for children older than 3) or display on your desk to remind you to lighten up.

Each of these is knit by hand without a pattern or instructions. I just wanted to have fun with free-form knitting without having to follow directions or take notes. As I finished up knitting them, I pulled all "tails" of yarn, and sometimes a little extra yarn, to the inside to serve as stuffing.

Then I put them in mesh bags and sent them through the wash several times to felt them, which makes them even smaller and "knits" the fibers together for extra firmness and body. After they're dry, I add wooden beads for heads and sew on their hats and embellishments.

They are all less than three inches high.


I've also been making more journals, some from beverage boxes and some repurposing the covers of vintage books.


Then I've taken the text blocks from the books and have been turning them into little stand-alone art pieces of their own.


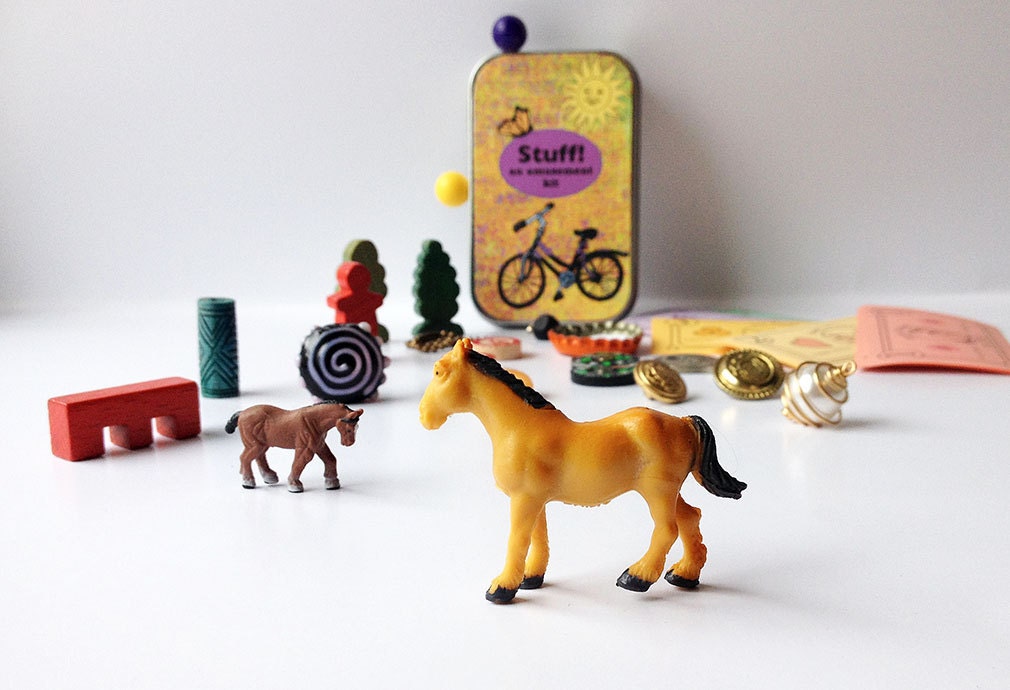
I've also been working on some upcycled decorated tins. I have been making these little kits or treasure boxes for kids for a few years now, each one is unique and is filled with assorted small toys and other objects. I have several of them ready to bring to LoLa.


But sometimes people give me their used mint tins to repurpose, and so I thought it would be fun to try something different: to fix up the tins but sell them empty so that other people could have the fun of putting together their own treasure boxes, whether as gifts (for kids or adults) or for themselves.

One of several tins-in-progress

In fact, there are a few stops along the LoLa art crawl where you can pick up some fabulous tiny things to put in your own tins, and I will have information and tips about them available for you.

Finally, I designed a DIY "mindfulness cube" with sayings on each side, to use as an object of contemplation or even as a small gift box. I will have a few of these assembled as examples, but will be selling only the flat sheets, printed on card stock, for people to make their own.


I hope to see you at the crawl!

Monday, March 17, 2014

Not Much Green on this Gray St. Patrick's Day


A little tip: If you want to grow your own clover for St. Patrick's Day, you should probably start the seeds on the 1st of February, and not the 11th, as I did this year. My notes from previous years did suggest that six weeks' lead time would be about right, but I just wasn't thinking about it at the beginning of February. Perhaps I'll try putting a reminder into my computer's calendar for next year.


Even so, any little bit of green is a welcome site on this gray day with sleet pelleting our windows and plenty of dirty snow still on the ground. And I am quite pleased that the little cyclamen and orchid plants I bought a few weeks ago are still sitting pretty in Grandma's old china. Those wee baby clover are nestled into a handmade porcelain cup by Minneapolis artist Dyann Myers, which I bought a few years ago in the spring at the St. Paul Art Crawl.

I have three little pots of clover; perhaps I'll transplant them to an Easter basket after today. They should be positively robust by the 20th of April.

Sunday, June 30, 2013

Because We Just Gotta Have an Afternoon Patio and a Morning Patio

This is the corner of our backyard that used to be Julia's garden, but which was a mess of weeds, raspberries and flowers by the time we bought the house. Little by little, I've been moving the various flowers to different parts of the yard, and some of the raspberries to the kitchen garden near the alley, then digging out the weeds.

That corner also had a small patio, which our neighbors have told us was where Julia's husband, Harry, used to like to sit. Apparently Julia didn't really use it after Harry died. That patio was too small and too sunny in the afternoon for us, so we took those blocks, plus some other materials salvaged from elsewhere in the yard, to make a patio on the east side of the house, which gets shade by three in the afternoon.

But that patio is too bright and sometimes too hot in the morning, when it would be lovely to take tea and the newspaper outside, so we decided we needed a second, morning patio, and realized that the best spot for that was on the west side of the garage—Harry's old patio spot. We figured that a second patio would also allow space for a fire bowl, which doesn't really fit on the first patio because we have a dining table and chairs there. The whole backyard is shady by about 6:30 in the evening, so either spot is pleasant in the evening.

But since it's Sunday and we both want to have a leisurely breakfast and read the paper for a bit before beginning any ambitious projects, by the time we started working on this shady-in-the-morning patio, it was in full sun.

So this is how my husband relaxes on his day off.

After leveling the soil and spreading 15 bags of sand, Craig placed a big honkin' heavy square hunk of cement, which had been sitting by the alley, at a strategic point, which will be where the fire bowl sits.

Then I say, Hey, how about edging that with some bricks? Because I'm full of good ideas like that.


The bricks are a mismatch of some we found here and there in the yard and a few our neighbor was discarding, including this one stamped Purington Paver, which looks kinda like an artifact to me, so I make sure to place it so the inscription will show. (The little square gap will be filled with pebbles or a small plant, I haven't decided yet.)


Over the past couple of weeks, Craig has carted about three dozen or so rectangular patio blocks from the house of a friend who didn't want them anymore; we also collected a few discarded blocks from our neighbor. So we started arranging them in a sort of herringbone pattern. (Yes: "we"; I did help, I'm just not in any of the pictures because I was taking them.) Then, at this point, I say, I think it all needs to be moved about a foot or so to the left. Because I'm helpful that way.


It's just that we needed a little more space between the fire bowl and the chairs; and it did soon occur to us that we could just move the big square far enough over to insert another row of the rectangles, rather than move all of them.

It's about four in the afternoon when Craig puts the finishing touches on the new patio, and sits down to take a little break.


But as it's still sunny there, he soon came over to the "old" patio (constructed two years ago) to join me in the shade. Tomorrow morning he'll head off to work and I'll be in charge of trying out the "morning" patio. It's another way in which I'm helpful.


Tuesday, June 25, 2013

Wrenifications


The wren first appeared in our backyard a couple of weeks ago, announcing his presence with what the Cornell Lab of Ornithology describes as a “rush-and-jumble song.” I was delighted to see him checking out the small bird house near the patio, then became alarmed when he headed over to the slightly larger one by the kitchen garden, because I thought the chickadees were still using it.

Wrens are known to be real estate hogs, stuffing many houses with twigs to form “dummy nests” so that other birds can’t use them; they sometimes go even further than that and actively eliminate the competiton. According to Cornell, wrens are sometimes the main reason for nest failure of bluebirds and chickadees, as well as some other species, which is why many birders don’t like them. So I was worried that the little fellow was going to do harm to the chickadee chicks.

I scurried over to shoo him away, saying, “You get away from there! That’s the chickadee house! You use the other house!”

“You’re talking to a bird,” said my husband from his seat on the patio.

The wren scuttled onto a perch in our neighbor Sue’s lilac bush, and I noticed that she had a bird house next to her garage also. Aha!  No wonder our yard is a magnet for the little speculator.

I didn’t hear any peeps coming from the chickadee house, so I decided to inspect it to see if the chicks were okay (a well-designed bird house will be easy to open so you can keep an eye on its inhabitants). What I found was a clearly abandoned nest. I then remembered seeing chickadees in the lilacs about a week ago, fluttering their wings like fledglings, but as they looked identical to the adults (not scruffy like robins) and I did not see them on the ground, I hadn’t put two and two together.

So I apologized to the wren, and he was soon happily stuffing twigs into both of our bird houses and, I suspect, Sue’s as well.

“In spring, the male establishes a small breeding territory by singing from exposed perches and putting stick foundations in prospective nest holes,” wrote Donald and Lillian Stokes in their Field Guide to Birds.

After several days of this, there was suddenly a noticeable absense of the wren’s musical bravado in the morning. Had his mate selected some other house down the block? If so, I was indeed sorry. They may be bad birds, but they’re voracious insectivores, and as a gardener first and bird watcher by extension, I would dearly love to have a family of wrens on pest patrol in my garden.

Then one morning I heard not only his by-now familiar burbling call, but a whole lot of chittering. I looked out the window to see two wrens engaged in a lively discussion as one perched on a nearby branch while the other went in and out of each of the houses.

It was fun to see this “songful tour of inspection,” as described by Christopher Leahy in The Birdwatcher’s Companion, after which the female chooses a nest and finishes it. And she’s a clever bird in setting up housekeeping, for she is known to stash a few spider egg sacs in the nest so that the spiders will devour any parasites that may infest the chicks, say the folks at Cornell.

I’m having a hard time telling which house she chose, as they appear to be dallying about both houses still. They are very active little birds, and the sexes look alike, so I find myself wondering if there is, indeed, only one female. According to Leahy, the name wren, which comes from the Anglo Saxons, has a traditional second meaning of one who is lascivious, possibly because of the polygamy of male wrens.

Sunday, June 16, 2013

Another Harvest of Little Blue Flowers, as Henry Hudson Looks On

I'm happy to announce that summer has finally arrived in Minneapolis. A friend recently posted on Facebook an overheard comment that pretty much sums it up for all of us: "Looks like summer finally got the memo."

Although the patio, on the east side of the house, is a little too sunny in the morning, there is a little period from about 9:30 to 10 or so when the huge maple tree across the alley casts a bit of dappled shade just where we need it, so we took our tea and the Sunday paper out to sit on the patio for a bit.


The Henry Hudson rose that we planted next to the patio last summer seems quite happy with its morning sun, though.

Once the patio was back in full sun again, we took advantage of the brief morning shade in one of the sunniest parts of our yard, just west of the garage, to do a little digging and transplanting. It's the previous owner's former perennial garden, which had become a raspberry thicket by the time we bought the house, so we've been having at it from time to time, replanting some of the raspberries to a different spot and discovering what else has been growing there under the thorny canes, besides dandelions and tall lawn grasses, that is.

Among the gems hidden amongst the raspberries was this dictamnus (aka gas plant) that I transplanted a couple of weeks ago. As you can see, it has taken happily to its new home.

Craig digs, I transplant. We have to do this side by side because Craig will go at the job with abandon if I'm not there to say, "Stop! Those are daffodils! And those are grape hyacinths!" (To be fair, the strappy leaves do look a lot like grass by this time.) So, dig and replant was the theme of the morning. I've been trying to do most of my transplanting during the week when he's at work, but last week I was too busy with other things and he was anxious to get on with the job of clearing this area out so we can replant it in some sort of orderly fashion.

There are some pretty blue flowers that I forget the name of (I figured it out last summer, but I'm not sure where I wrote it down; some sort of verbena or vervain, I think). I transplanted a few clumps, but much of it is overgrown, falling open at the center, and the lower leaves are looking spotted and unhealthy, so I am only transplanting the separate stands here and there that are smaller and healthier. However, I hate to throw the pretty blue flowers in the compost, so I harvested nearly all the stems from the big clump and brought them inside for a bouquet.


I also hated to toss the confetti of little flowers that fell on the counter top while I was trimming the stems, so I gathered them into a small bowl and placed it on the table to be ready to catch some of the others that fall. It's not the best florists' flower, for all of its flower-shedding tendencies, but I sure like that riot of little blue blossoms.


Tuesday, June 4, 2013

Transplanting and bouquet gathering

One portion of the fernleaf peony in its new home.
The rules for digging up and transplanting or dividing perennials are pretty simple: do it when they are first emerging, unless they normally flower early in the season, and then it's best to wait until late summer, long after they're done flowering. Or something like that.

But what if it's raining every day and you are still dealing with a big messy weedy patch where a garden used to be, and you really want to transplant all the good stuff as early in the summer as you can so you can clear the rest of it out and get on with doing something else with that corner of your landscape?

Well, then you just muddle along as best you can.

I once asked a Master Gardener if I could get away with transplanting a perennial in the middle of summer, during hot weather. She said, "Yes, if it doesn't realize you're moving it." Gardeners often speak of plants as if they were sentient beings, so I had no trouble understanding what she meant: dig it up in one big clump without disturbing the roots.

This is more easily done with some plants than with others. So when I tried to dig up the fernleaf peony (Paeonia tenuifolia), even as it had flower buds forming, I was dismayed when the roots fell apart as I attempted to lift it from the ground. It was an old peony and was due to be divided anyway, but late May is not the time to divide peonies!

So I performed a little triage, removing all the stems that had flower buds on them and bringing them indoors to put them in a vase, then transplanting about half the plant. I'll transplant the other half too, once I decide where I want to put it. I'm sure I won't see any more flowers on this plant this year, but it will have plenty of time to adjust to its new home and should bloom happily next spring.

The newly transplanted dictamnus, next to a successfully relocated lily.
The other plant on the verge of flowering that I dug up, with more success, was the dictamnus, or gas plant (Dictamnus albus). After the experience with the peony, I tried a different approach. First I sharpened my spade with a file, then I shoved the spade into the ground all around the plant before attempting to lift it, and as a result I got a pretty intact root clump, dirt and all. It helps that the ground has plenty of moisture in it from all the rain we've been getting.

I was careful to plant it at exactly the same depth as before, but with a hole that was a bit wider than the root ball, then filling in around it with little or no disturbance to the roots. Still, there were a few stray stems, so I cut those off and brought them in to add to the bouquet. I also moved a lily, but that won't bloom until late July or August, so it isn't showing any sign of forming buds yet.

Finally, I took some flowers from the mountain bluet (Centaurea montana), because I plan to move that one soon as well. And a little blue in the bouquet seemed like just the right complement for those dark red buds from the other two flowers.

It remains to be seen if the dictamnus will proceed to blossom as normal. If the flowers show no sign of opening after a reasonable period of time, I will have to cut it all back a bit so the failed buds don't deplete the plant's energy.

My bouquet of mostly closed flower buds is not particularly showy, but I enjoy the understated mix of foliage dotted with blossoms (that is one of the perks of having a fernleaf peony -- the great foliage). And I'm a couple of steps closer to taming the backyard, which is actually worth the sacrifice of a few flowers here and there. Like a good bouquet, a pleasing landscape is more about the composition than about the individual elements contained within it.